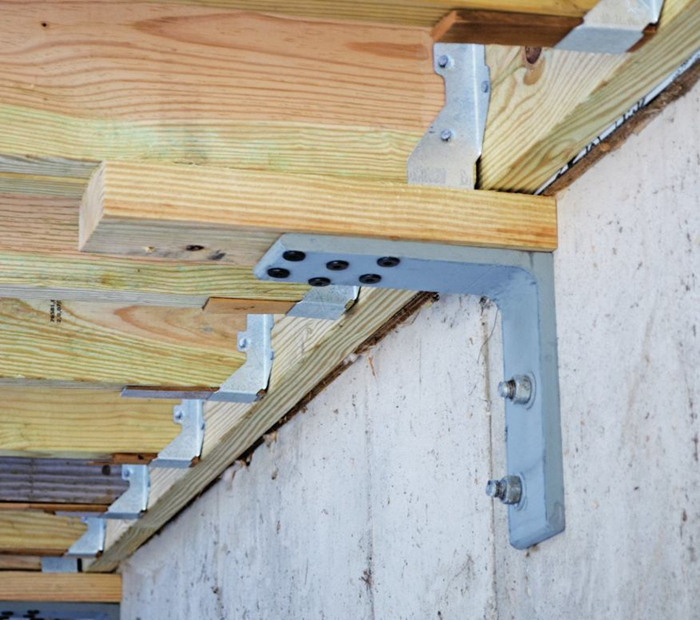
This method is used most often. It is the simplest, but at the same time reliable, since the beam lies on the wall and completely rests on it. On wooden and frame walls, the beam is fixed with special steel corners, wood screws, dowels or studs. In the walls made of brick or building blocks, niches are made during the masonry process.
Fastening with corners
Using perforated steel corners, the floor beams are fastened to the wall plate installed on stone walls, to walls made of logs or timber, as well as to the upper longitudinal beam of the frame. It is laid on top and fixed with corners on the sides if it is a carriage board installed on the edge. The timber can be fixed both on the side and below.
When installing the floors on the frame, the beams are shifted so that they do not lie on the support posts. This is permissible only if there is a project implying such an arrangement of beams and a load calculation.
Fastening with bolts and studs
This type of fastener can only be used to fix a beam or I-beam. After marking and laying out the beam on site, a through hole is drilled in the beam, going into the upper part of the wall. If hidden fastening is required, a larger diameter recess is made for the bolt head or nut. The screw fastener is inserted into the hole and tightened with a ratchet wrench. In metal I-beams, holes are drilled on both sides of the support plane.
After installing and fixing the beams, you can continue to erect the walls of the second floor, cutting grooves in the logs of the first row according to the markings to the height of the beam. Or laying this row in log sections, the length of which is equal to the step between the beams. If you extend them beyond the outer walls in the upper floor, it is possible to fasten the rafters to the beams, which will simultaneously serve as the lower ties of the rafter trusses.

